Software Development
Introduction …
This is a shameless placeholder for the software development section.
There are roughly 3 to 5 ways to develop for the Badge (depending on how you count:)
- Micropython : write apps in Python! This is the easiest way to get started, with the additional benefit that you probably don’t need to install anything (or much). Actually this should be the easiest way, but unfortunately has the fewest docs. Have a look here for documentation of the Python modules on the Badge.
- ESP-IDF : native EPS apps using the IDF (IoT Development Framework)
- FPGA : this is the special feature … not happy with the Tensilica CPU on the ESP? Just implement your own RISC-V core (or, to get started, connect all the buttons together with an AND gate…)
The other two plus (depending on how well you can count) :
- RP2040: aka Raspberry Pico. This is an onboard conprocessor that we are using as our USB Lifeline to the outside world. As such, if you break stuff here, you can easily brick your badge. Feel free to play around with it, but be aware: THIS VOIDS YOUR WARRANTY … and not in a fun way. It’s very unlikely we’ll have the resource to help you fix the badge during the camp.
- RISC-V and Forth: Because the badge contains an FPGA, you can turn it into anything you want. Technically the RISC-V and Forth projects are just FPGA projects, but the RISC-V CPU is powerful enough to run a Mandelbrot and Tricorn fractal explorer. A different RISC-V processor implementation with a focus on performance instead of readability can even run Doom! The Forth includes a custom stack processor and besides being useful for interactice experiments with freshly soldered additions on the PMOD connector, it can run a game of Snake.
- Rust: just a hint or two to get you started. Ask around the Telegram channel if you need support.
- TinyGo: Some hints on getting started with TinyGo on the Badge and some samples …
- Arduino: this was intended to be done and beautifully polished … but then we all got COVID and couldn’t finish. You can try to develop apps with Arduino if you think it will be easier, but it will probably cause some pain. Of course, we would be ecstatic if you help getting it work smoothly.
Linux permissions
Regardless of the way you’re going to program the badge, to connect to the badge over USB from Linux, do the following.
Create /etc/udev/rules.d/99-mch2022.rules with the following contents:
SUBSYSTEM=="usb", ATTR{idVendor}=="16d0", ATTR{idProduct}=="0f9a", MODE="0666"
Then run the following commands to apply the new rule:
sudo udevadm control --reload-rules
sudo udevadm trigger
Windows installation
To upload programs to the badge with the provided tools, python and pyusb are needed. The easiest way to install these on windows is by installing miniconda
After installation, open “Anaconda prompt” from the start menu. Then do the following
conda create -n badge -c conda-forge python pyusb
conda activate badge
Now you should be able to run commands like:
python ".\Desktop\mch2022-tools-master\webusb_fat_push.py" .\Desktop\my_test.py /flash/apps/python/button_tester/__init__.py
Micropython
The Badge comes with a preinstalled Micropython interpreter. Python should be the easiest way to control the device and the easiest mode to write apps for The Badge, especially if you are a beginner or don’t want to spend a lot of time downloading toolchains and debugging drivers.
Before the Camp and if you are afraid to break things…
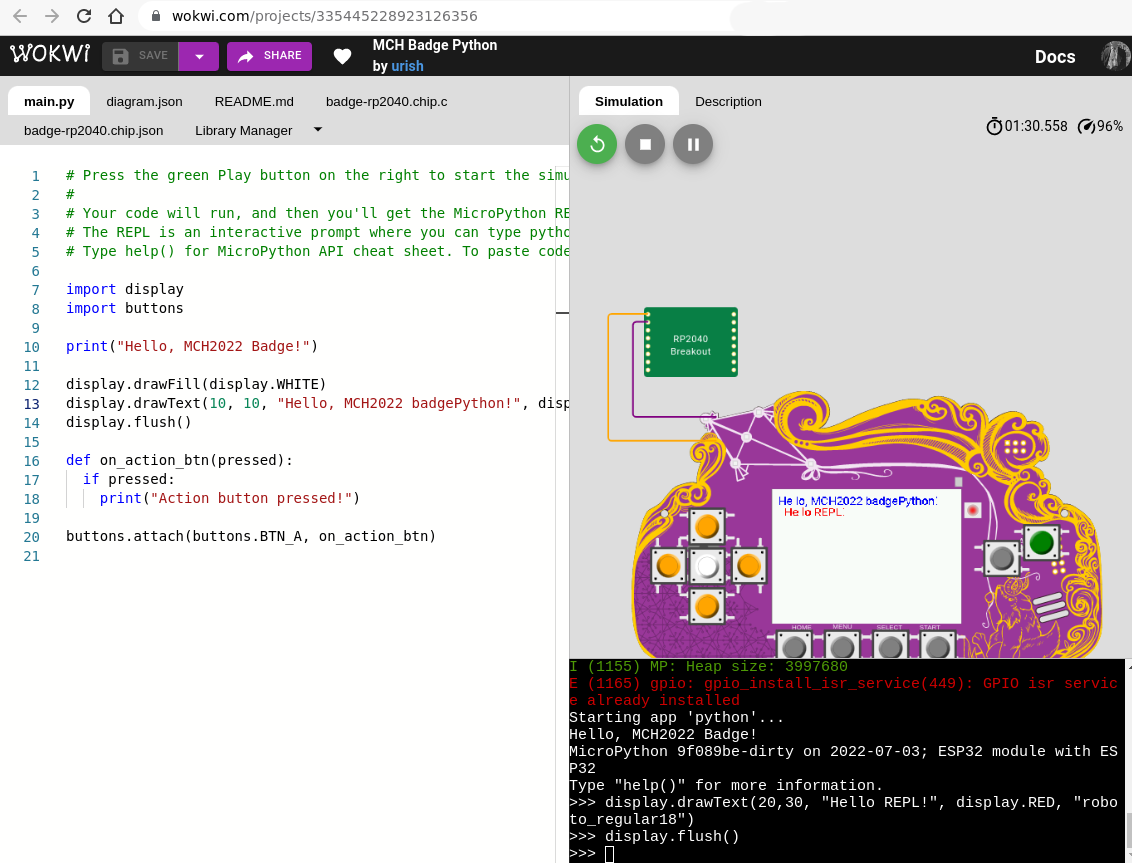
Uri Shaked a.k.a Wokwi built an awesome emulation of the badge that runs in your browser. You can use it to test stuff out if you don’t yet have a Badge or your Badge is being used for something else. Or if you just feel more comfortable with a Badge that can’t catch on fire. It fantastic, you can click the buttons and everything! Try it.

On the device!
First, make sure Python is installed and that you didn’t accidentally
delete it. Check in the apps menu. If it’s not there: install the
Python app from the Hatchery by going to Hatchery -> ESP32 native binaries -> Utility -> Python and install it either onto the flash or
onto an SD card.
This badge contains a common ESP32 firmware platform shared with other
badges, so to learn more about the general platform and its components,
start
here.
In addition there is also a mch22 module that offers a few
badge-specific APIs.
While the above allows you to access the Python shell and install Python apps from the hatchery, here is how you upload custom apps to the badge over USB:
- Download mch2022-tools
- Write you Python code using the platform modules documented above
- Use
python3 webusb_fat_push.py __init__.py /sdcard/apps/python/myapp/__init__.py - Start your app in the Apps menu.
There’s a more detailled description on Micropython development here.
Rust development for the ESP32
Short description on how to install the tools for Rust development for the ESP32 on the badge