Rust development for the ESP32
Short description on how to install the tools for Rust development for the ESP32 on the badge
Tools installation
- Rust toolchain from https://github.com/esp-rs/rust-build. Follow the instructions given there.
- If you get an error concerning
virtualenvtry uninstalling viapipand reinstalling viaaptor vice versa … - Install cargo-generate (
cargo install cargo-generate). If this fails, try just running:rustup update - Install the mch2022 webusb tools
Project workflow
- Create a new project as follows:
$ cargo generate --git https://github.com/esp-rs/esp-idf-template cargo
🤷   Project Name : argh
🔧   Destination: /MCH2022/rust-build/rust-esp/argh ...
🔧   Generating template ...
✔ 🤷   STD support · true
✔ 🤷   MCU · esp32
? 🤷   ESP-IDF native build version (v4.3.2 = previous stable, v4.4 = stable, mainline = UNSTA✔ 🤷   ESP-IDF native build version (v4.3.2 = previous stable, v4.4 = stable, mainline = UNSTABLE) · v4.4
? 🤷   Configure project to use Dev Containers (VS Code, GitHub Codespaces and Gitpod)? (bewar✔ 🤷   Configure project to use Dev Containers (VS Code, GitHub Codespaces and Gitpod)? (beware: Dev Containers not available for esp-idf v4.3.2) · false
[ 1/10]   Done: .cargo/config.toml
[ 2/10]   Done: .cargo
[ 3/10]   Done: .gitignore
[ 4/10]   Done: .vscode
[ 5/10]   Done: Cargo.toml
[ 6/10]   Done: build.rs
[ 7/10]   Done: rust-toolchain.toml
[ 8/10]   Done: sdkconfig.defaults
[ 9/10]   Done: src/main.rs
[10/10]   Done: src
🔧   Moving generated files into: `/MCH2022/rust-build/rust-esp/argh`...
💡   Initializing a fresh Git repository
✨   Done! New project created /MCH2022/rust-build/rust-esp/argh

$ cd argh
- Generate an app image using:
# Tell Rust which toolchain to use (you only need to do this once ...)
$ rustup override set esp
info: override toolchain for '/home/<YOUR_USER_NAME>/projects/MCH2022/rust-build/rust-esp/argh' set to 'esp'

# set some environment variables, so rust knows where to find its tools:
# you will probably want to save this in a little 'source' scriptlet ...
export PATH="/home/<YOUR_USER_NAME>/.espressif/tools/xtensa-esp32-elf-gcc/8_4_0-esp-2021r2-patch3-x86_64-unknown-linux-gnu/bin/:/home/<YOUR_USER_NAME>/.espressif/tools/xtensa-esp32s2-elf-gcc/8_4_0-esp-2021r2-patch3-x86_64-unknown-linux-gnu/bin/:/home/<YOUR_USER_NAME>/.espressif/tools/xtensa-esp32s3-elf-gcc/8_4_0-esp-2021r2-patch3-x86_64-unknown-linux-gnu/bin/:$PATH"
export LIBCLANG_PATH="/home/<YOUR_USER_NAME>/.espressif/tools/xtensa-esp32-elf-clang/esp-14.0.0-20220415-x86_64-unknown-linux-gnu/lib/"


# finally, build the image ...
$ cargo espflash save-image ESP32 rust_esp.img
    Updating crates.io index
  Downloaded filetime v0.2.17
  Downloaded env_logger v0.9.0
  Downloaded libloading v0.7.3
	... literally download the _entire_ entire internet ...
	...
	... argh
	...
- Upload the image using web USB:
$ webusb_push.py --run rust rust_esp.img
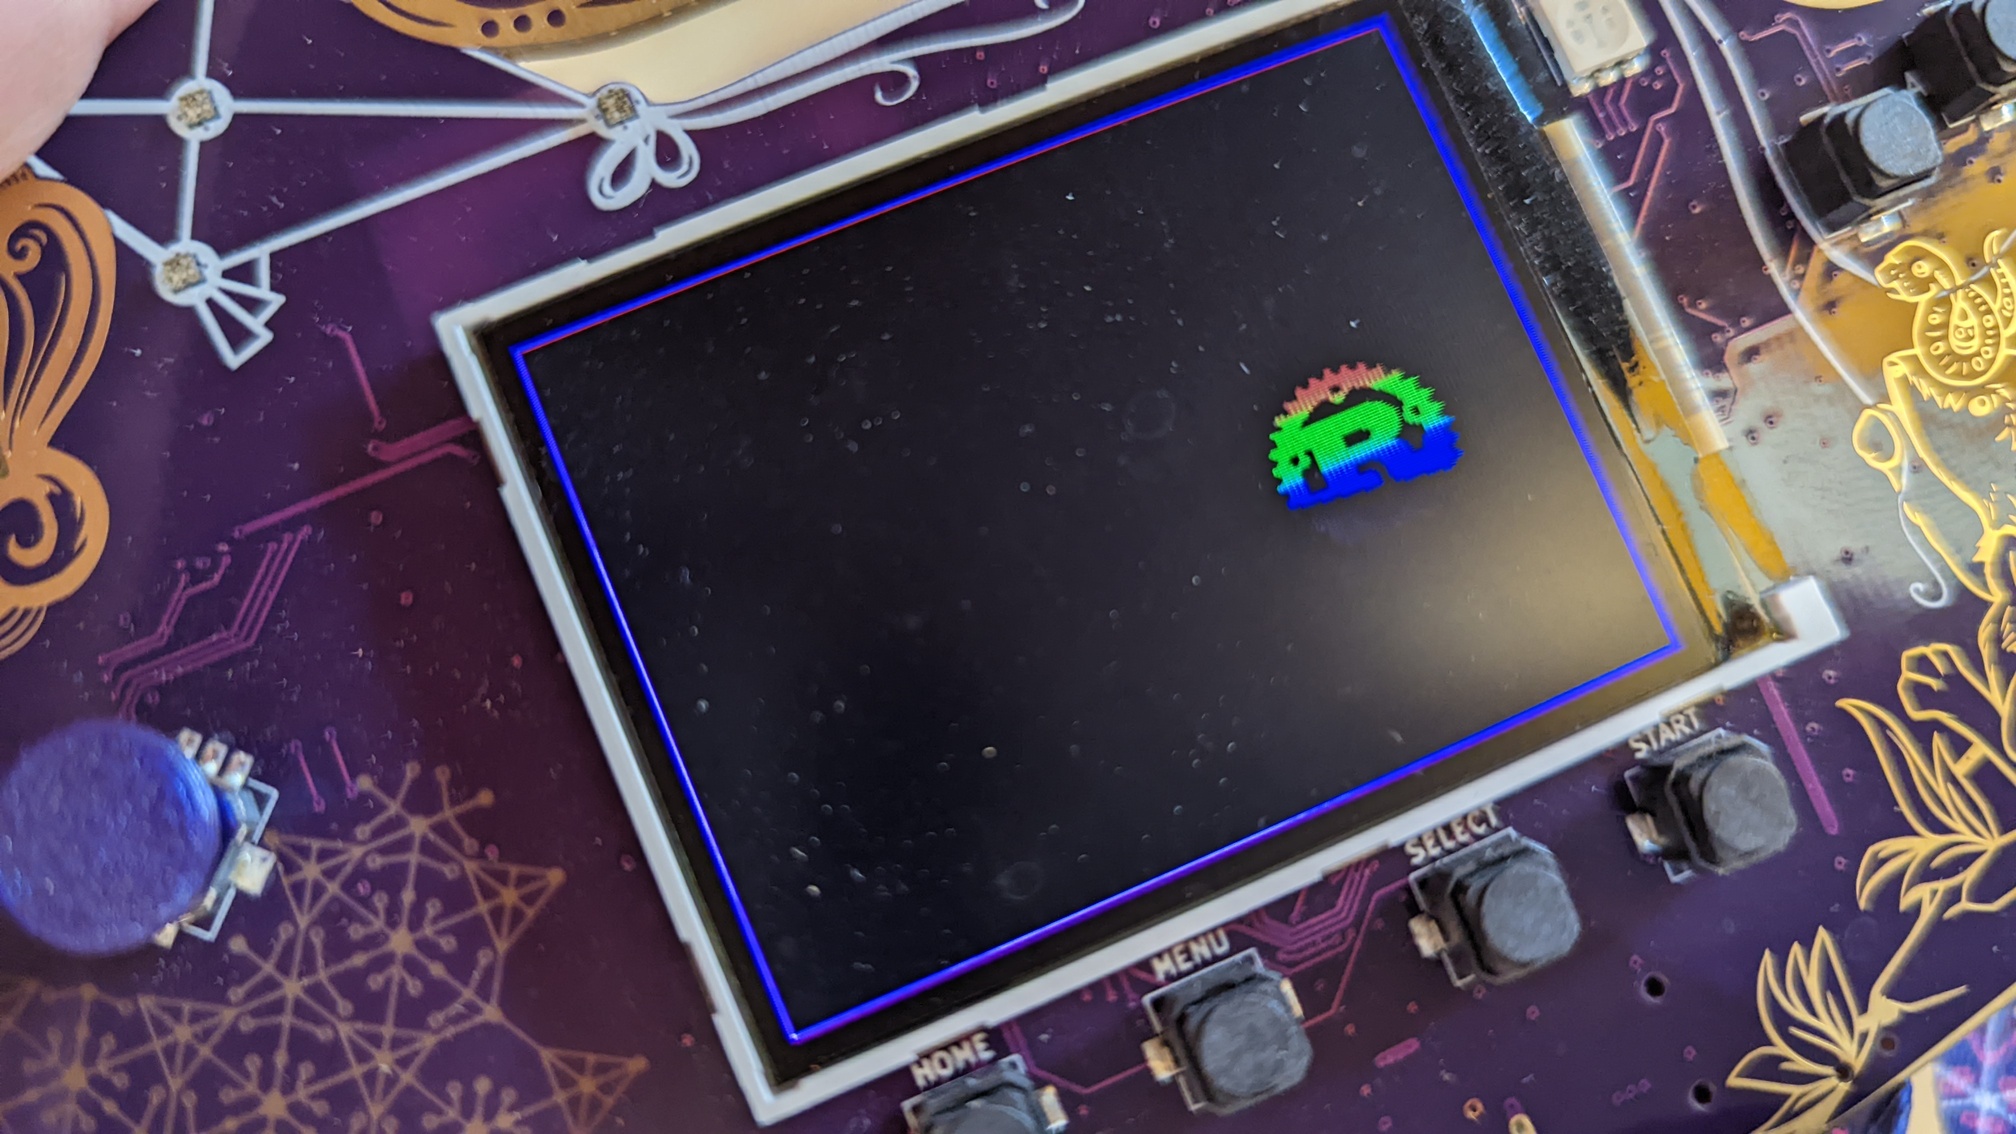
A more elaborate example.
You can find a more elaborate example that drives the display a shows a nice rust screensaver in The Hatchery and on github.
I’ve been told there is some magic involved to grab control of the screen
Limitations
These instructions use the esp-idf as provided by Espressif so you won’t have access to the components added by the Badge.team. It’s probably possible to use the version provided by the Badge.team, but I have not tried this.
Also: this seems to work on some computers and not on others … Please feel free to provide a PR to the documentation or a link to a sample app … Make sure you’re using the newest version of everything. Throw away your computer and by a Windows one …